

We all love an easy DIY project! Crafting guru Tamara Maynes created five homeware designs that are stylish and affordable – so you can make them yourself, too and be dubbed the DIY mogul of your family!
We all have an empty corner in a room that could do with a little more decor love. So, how about filling it with something worth looking at? Using raw materials and a few gilded touches, Tamara Maynes has come up with five cool and creative designs to turn a neglected space into something special. Transform some copper piping and timber offcuts into sculptural clothes hangers, metal serving bowls into an ultra-modern pendant light, and a sheet of plywood into an abstract artwork for the wall. And, if you have a spare bag of concrete mix laying around, why not make some industrial-style candle holders, or a bookend topped with shiny crystals? Get creative!
CLOTHING HANGERS
You will need:
Tape measure; pencil; 16 mm dowel; 20 mm copper pipe; handsaw; pipe cutter; drill; thin and wide drill bits; 10 cm × 10 cm timber cube (get your timber supplier to cut these to size for you); 1 zinc-plated eye screw; superglue; flat-head screw; 1 cup hook
METHOD
1. Measure from the ceiling where you would like the hanger to stop.
2. Measure and mark the dowel and copper pipe to this length. Cut it with a handsaw and pipe cutter.
3. Drill a narrow hole into the bottom of the timber cube. Screw in the eye screw.
4. Drill a wide hole in the top of the cube. Squeeze a little superglue in the hole, then push the flat-head screw into the hole, head first (leave the pointy end protruding out). Allow to dry.
5. Drill a narrow hole into each end of the dowel. Screw one end of the dowel onto the protruding screw.
6. Slide the pipe over the dowel. Screw the cup hook into the hole at the top.
7. Hang from the ceiling with another screw hook or appropriate fixture. It’s the perfect spot to hang your best party dress, or even a hanging plant.

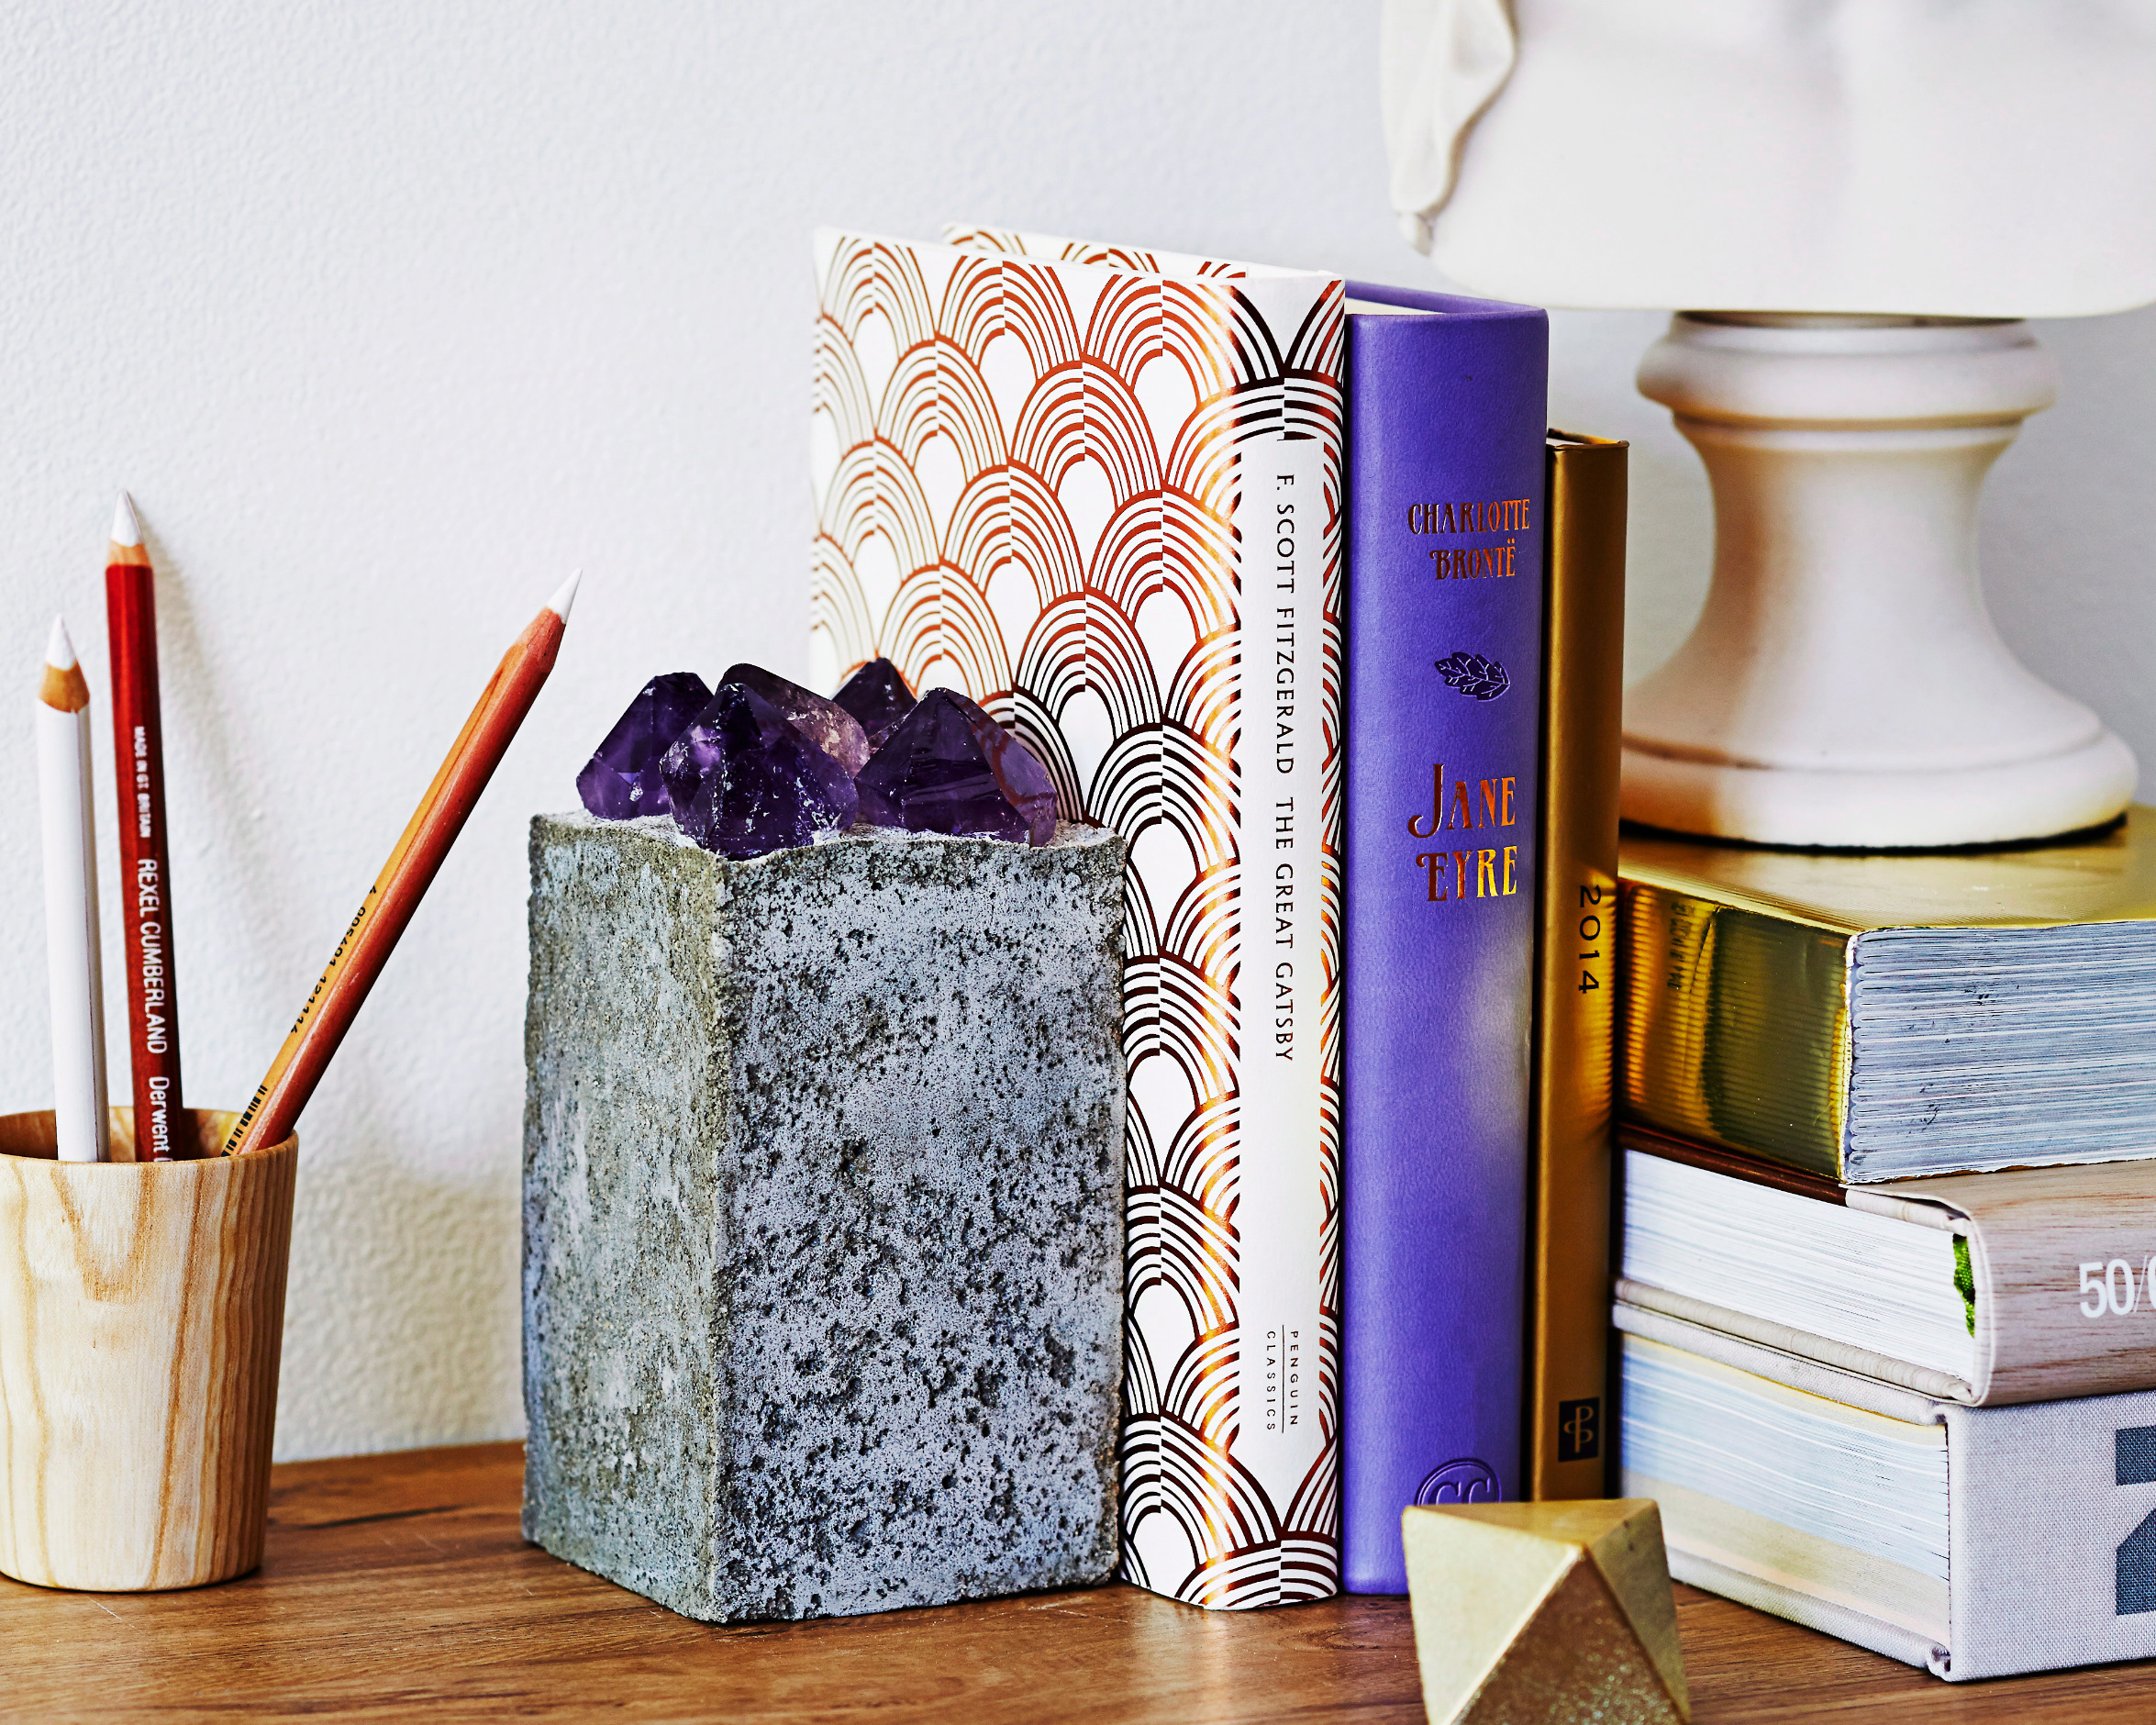
A SOLID BOOKEND
You will need:
Stiff cardboard or plastic; scissors; masking tape; concrete mix; plastic bucket; amethyst stones (or any crystals you fancy)
METHOD
1. Make a rectangular mould for the base using cardboard or plastic held together with tape.
2. Prepare concrete mix in a bucket according to the instructions. Fill the mould with concrete.
3. Gently push the amethyst stones into the wet concrete so that they are submerged.
4. Allow the concrete to set completely before removing the mould. Lean your glimmering bookend against your favourite books, or even use as a paperweight.
LIGHT FIXTURE
You will need:
Drill & drill bit slightly wider than light cord; 5 stainless-steel bowls (2 dipping bowls, 2 medium, 1 large); pendant light cord set (try hardware stores and lighting suppliers); screwdriver; large silver-reflector light globe
METHOD
1. Drill one hole into the bottom centre of each bowl.
2. Remove the ceiling fixture from a cord set to expose the cord.
3. Thread the cord through holes in bowls. Start with a large bowl and end with a small bowl; the first, third and fifth bowls need to be threaded on the cord upside down.
4. Reattach the ceiling fixture. Hang the pendant and screw in the light globe.
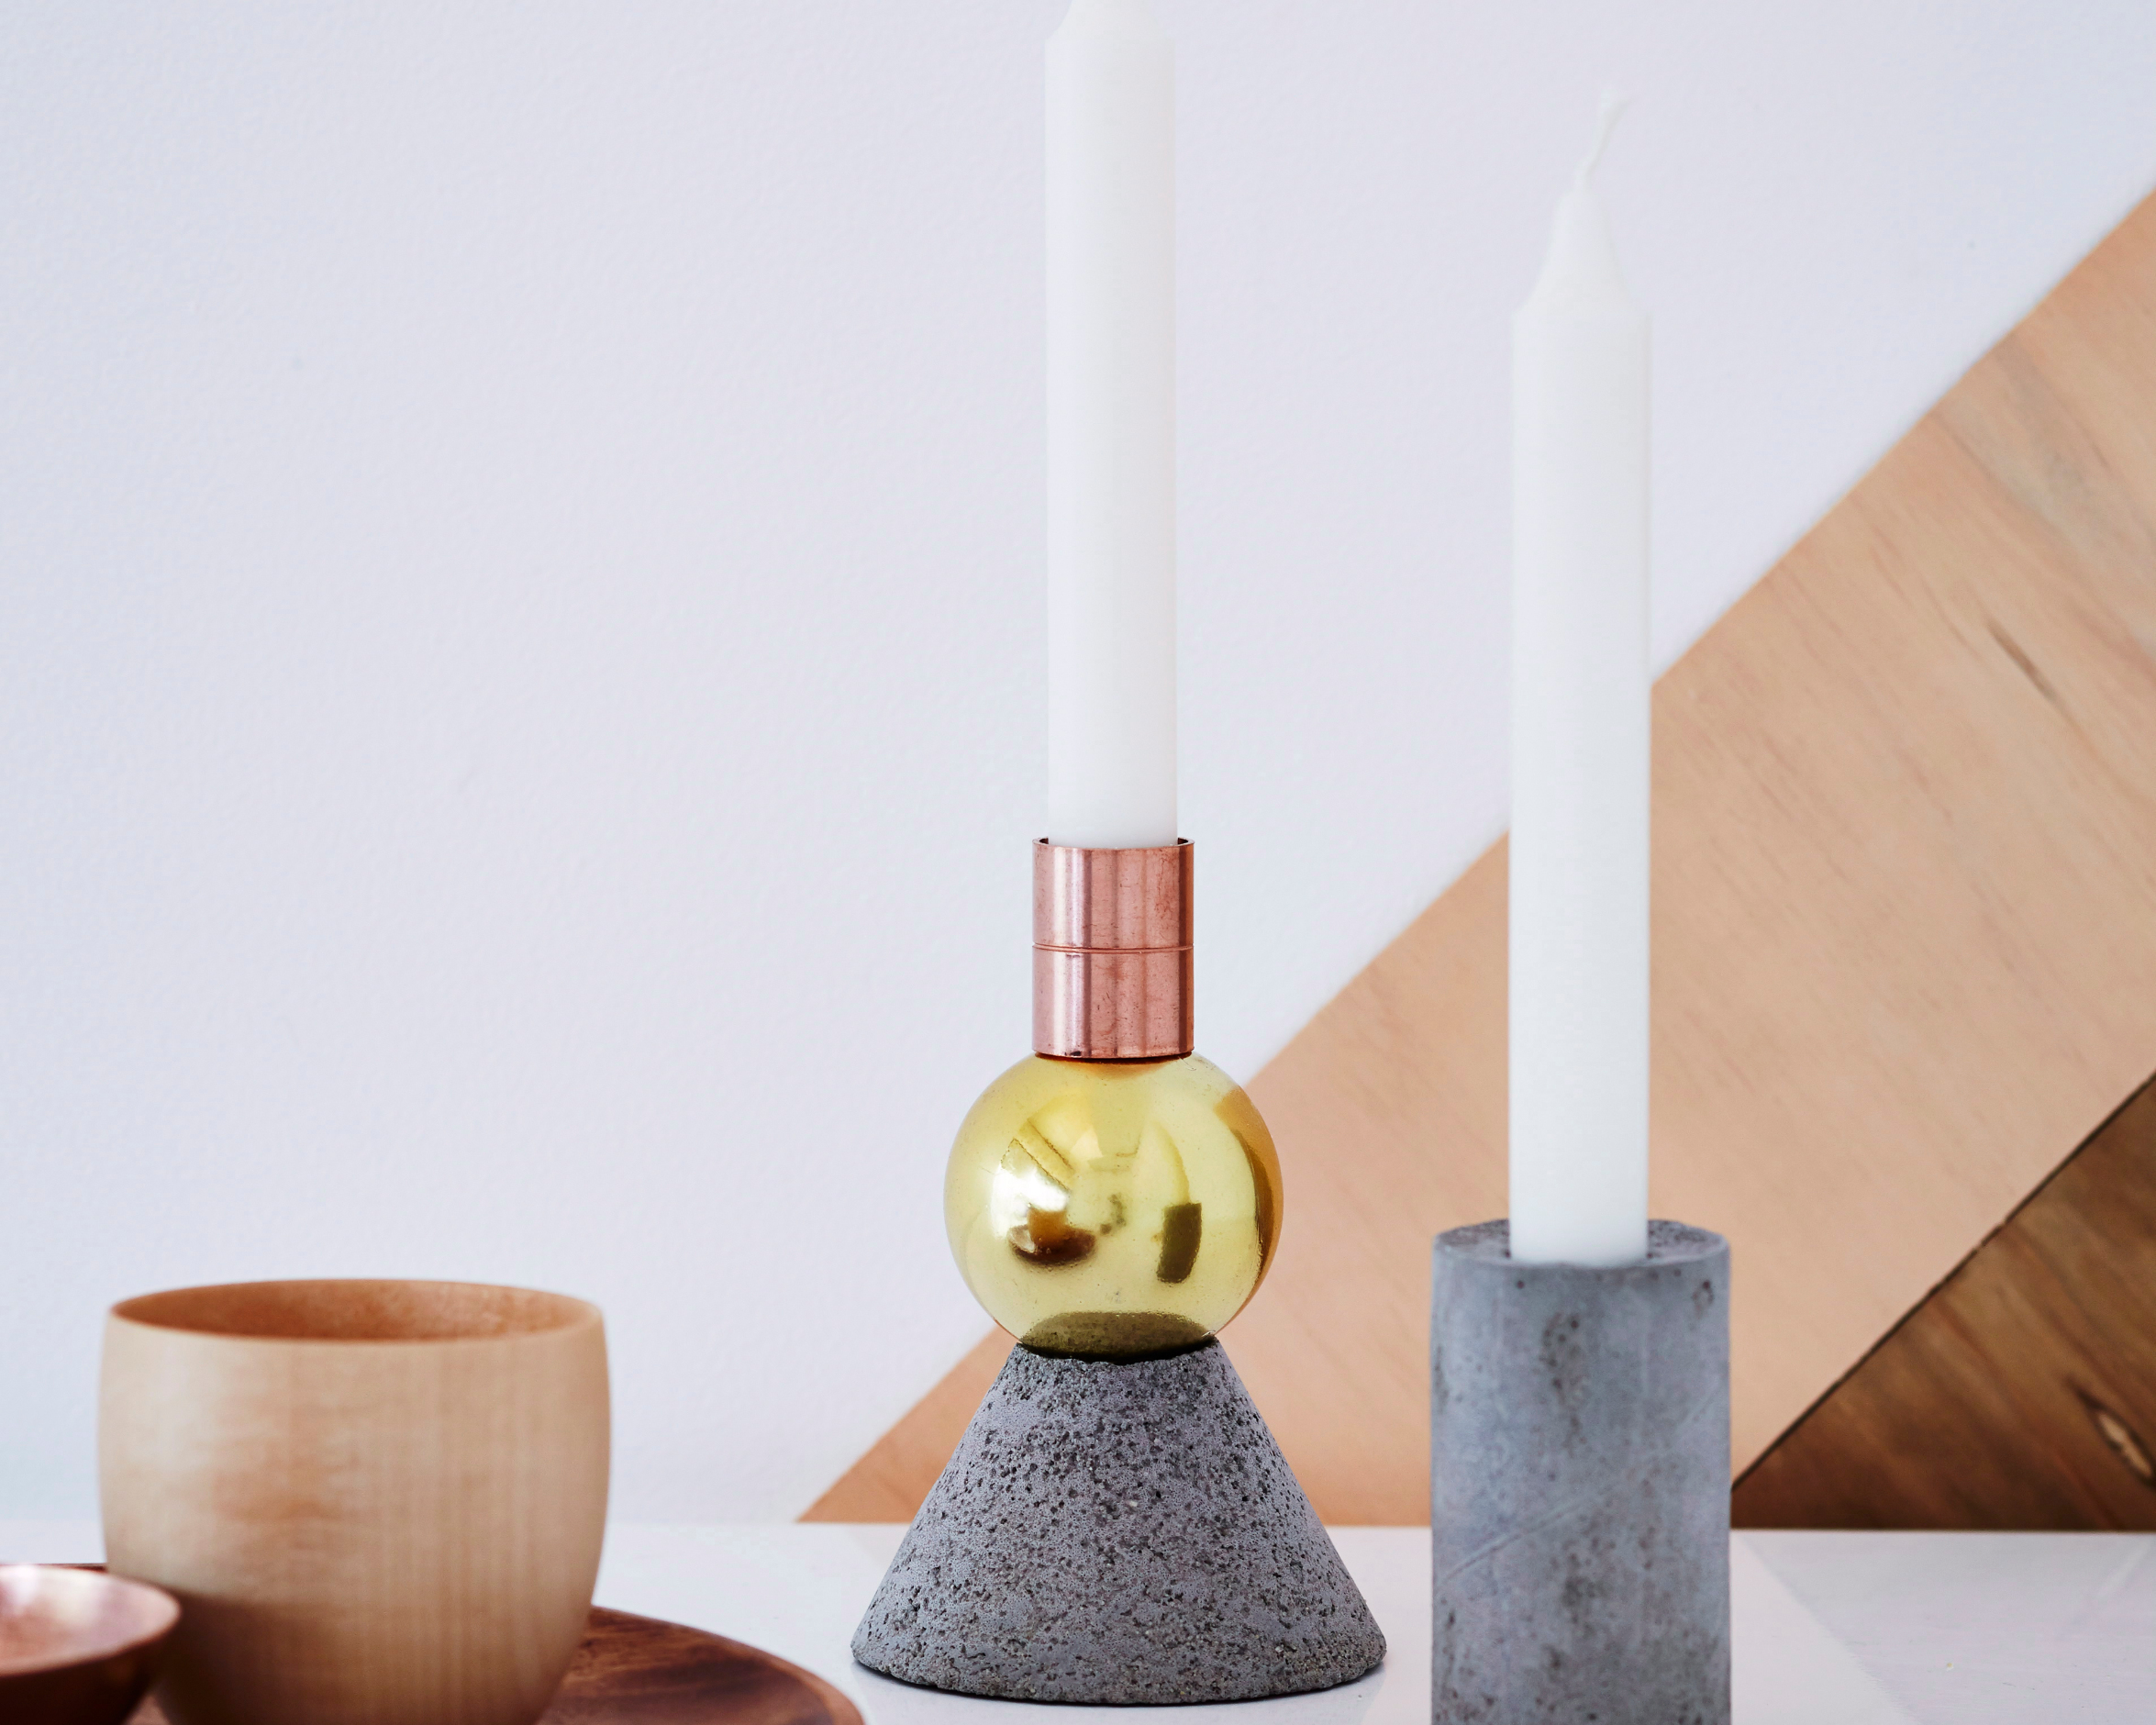
CANDLE HOLDERS
You will need:
Plastic funnel; scissors; cardboard tube (try a toilet paper or kitchen paper roll); stiff cardboard; masking tape; concrete mix; plastic bucket; drill & drill bit slightly wider than the skewer; 20 mm copper piping; pipe cutter; 2 candles; bamboo skewer; gold Christmas bauble
METHOD
1. Cut the funnel with scissors at the tapered end (you want the diameter of the hole to be approx 5 cm).
2. Make moulds by sealing off the large end of the funnel, and one end of the cardboard tube with stiff cardboard and masking tape.
3. Prepare the concrete mix in a bucket according to instructions. Fill the moulds with concrete.
4. Drill one hole into the top and bottom of the bauble. Cut a copper pipe with a pipe cutter into 4 cm-long pieces.
5. When the concrete is half set, gently push the candle into the top end of the tube mould.
6. Push a skewer into the cement at the open end of funnel so ¾ of the skewer is still visible. Thread a bauble over the skewer and push gently into the concrete. Allow it to set completely before removing the moulds. Note: You will need to cut the funnel to remove the concrete shape.
7. Thread the candle onto the skewer before sliding the copper pipe over the top. All that’s left to do now is light the candles when load-shedding comes around.
WALL-ART DESIGNS
You will need:
Pencil; paper; steel ruler; 3 mm-thick lightweight plywood sheet; cutting mat or plywood offcuts; utility knife; plastic containers; assorted interior paint; drop sheet; dish cloths; 3M Command Poster Strips (removable) or double-sided mounting tape (permanent)
METHOD
1. Sketch on a piece of paper the pattern you would like. Use a pencil and ruler to mark the desired shapes on plywood.
2. Place a cutting mat or plywood offcut underneath the plywood. Use a utility knife to carefully cut the plywood along marked lines. Note: You can achieve a clean cut by running the blade alongside the steel ruler.
3. In separate containers, mix one part water with one part of your chosen paint colour – this mixture will create a ‘washed’ effect.
4. Place the plywood pieces on top of the drop sheet. Use a dish cloth to wipe the paint mixture evenly over the pieces. Allow to dry.
5. Stick the plywood shapes to the wall in your desired pattern using poster strips or mounting tape.

Words by Alicia Taylor
Photography: Armediasyndication