
Get ready for the summer with great tips and projects from Homemology blogger Germarie Bruwer.
KOKEDAMA FOR AN ON-TREND PATIO
You will need:
• Balloon
• Cold glue
• Paint brush
• Coir
• Spray adhesive
• Twine
• Small plastic pots and plants from your garden
STEP 1
Blow up the balloon and place it in a small bowl to keep it stable, with the knot at the bottom. You want at least ¾ of the balloon to stick out. Brush the exposed parts of the balloon with glue.
STEP 2
Take wads of the coir and press it onto the cold glue until everything is covered. Press it down softly so that you don’t pop the balloon. Allow to dry.
STEP 3
Cover the coir-covered balloon with spray adhesive and then slowly tie twine around it all. It is easiest to turn the balloon and keep the twine still.
STEP 4
To make the macramé hanger, cut six pieces of twine roughly 50 cm long. Tie them together at the top. Divide them in pairs and knot each pair 20 cm from the top. Then split the pairs below the knot and tie each leg to the leg of an adjacent pair. This will create a mesh. Then tie all six strings together at the bottom, leaving a tassel hanging underneath.
STEP 5
Fill a small pot with potting soil and a plant and place inside the coir bowl. Place the bowl inside the hanger and hang up.

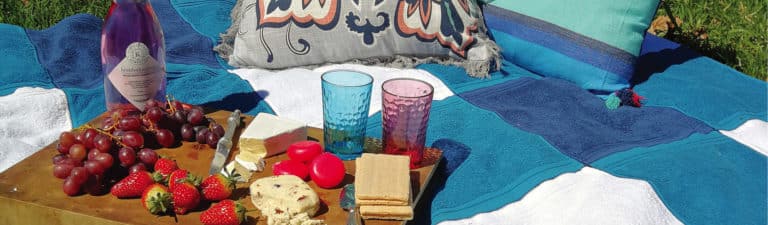
GINGHAM CHECK PICNIC BLANKET
You will need:
• Six white facecloths
• 13 light coloured facecloths (we used teal)
• Six dark coloured facecloths (we used navy)
• Sewing machine and thread (you can use matching thread or a contrasting one for afun twist)
STEP 1
Arrange the facecloths on a large flat surface. Start the first row with a light-coloured facecloth, followed by a dark one. Keep alternating until there are five facecloths in the first row. The second row begins with a white facecloth and is followed by a light-coloured one. Keep alternating until the row is complete. Add another light and dark coloured row, and then a white and light coloured row, and finish off with the final alternating light- and dark-coloured cloths.
STEP 2
Sew the facecloths together one row at a time. Don’t overlap the edges; simply place them side-by-side and use a small zigzag stitch. Once you have completed the five rows, sew their long edges together taking care to line the corners up perfectly. Facecloths are made from very forgiving material so manipulate the edges while sewing to make them line up.

For more great tips and projects from Homemology blogger Germarie Bruwer, page through your January issue of Livingspace.